A “session” in Pool Hall Master is the entire span of time from when the first player is added to a table until the last player is checked out. Unlike some POS systems, there is no explicit Start Session button — adding a player is starting the session.
Starting
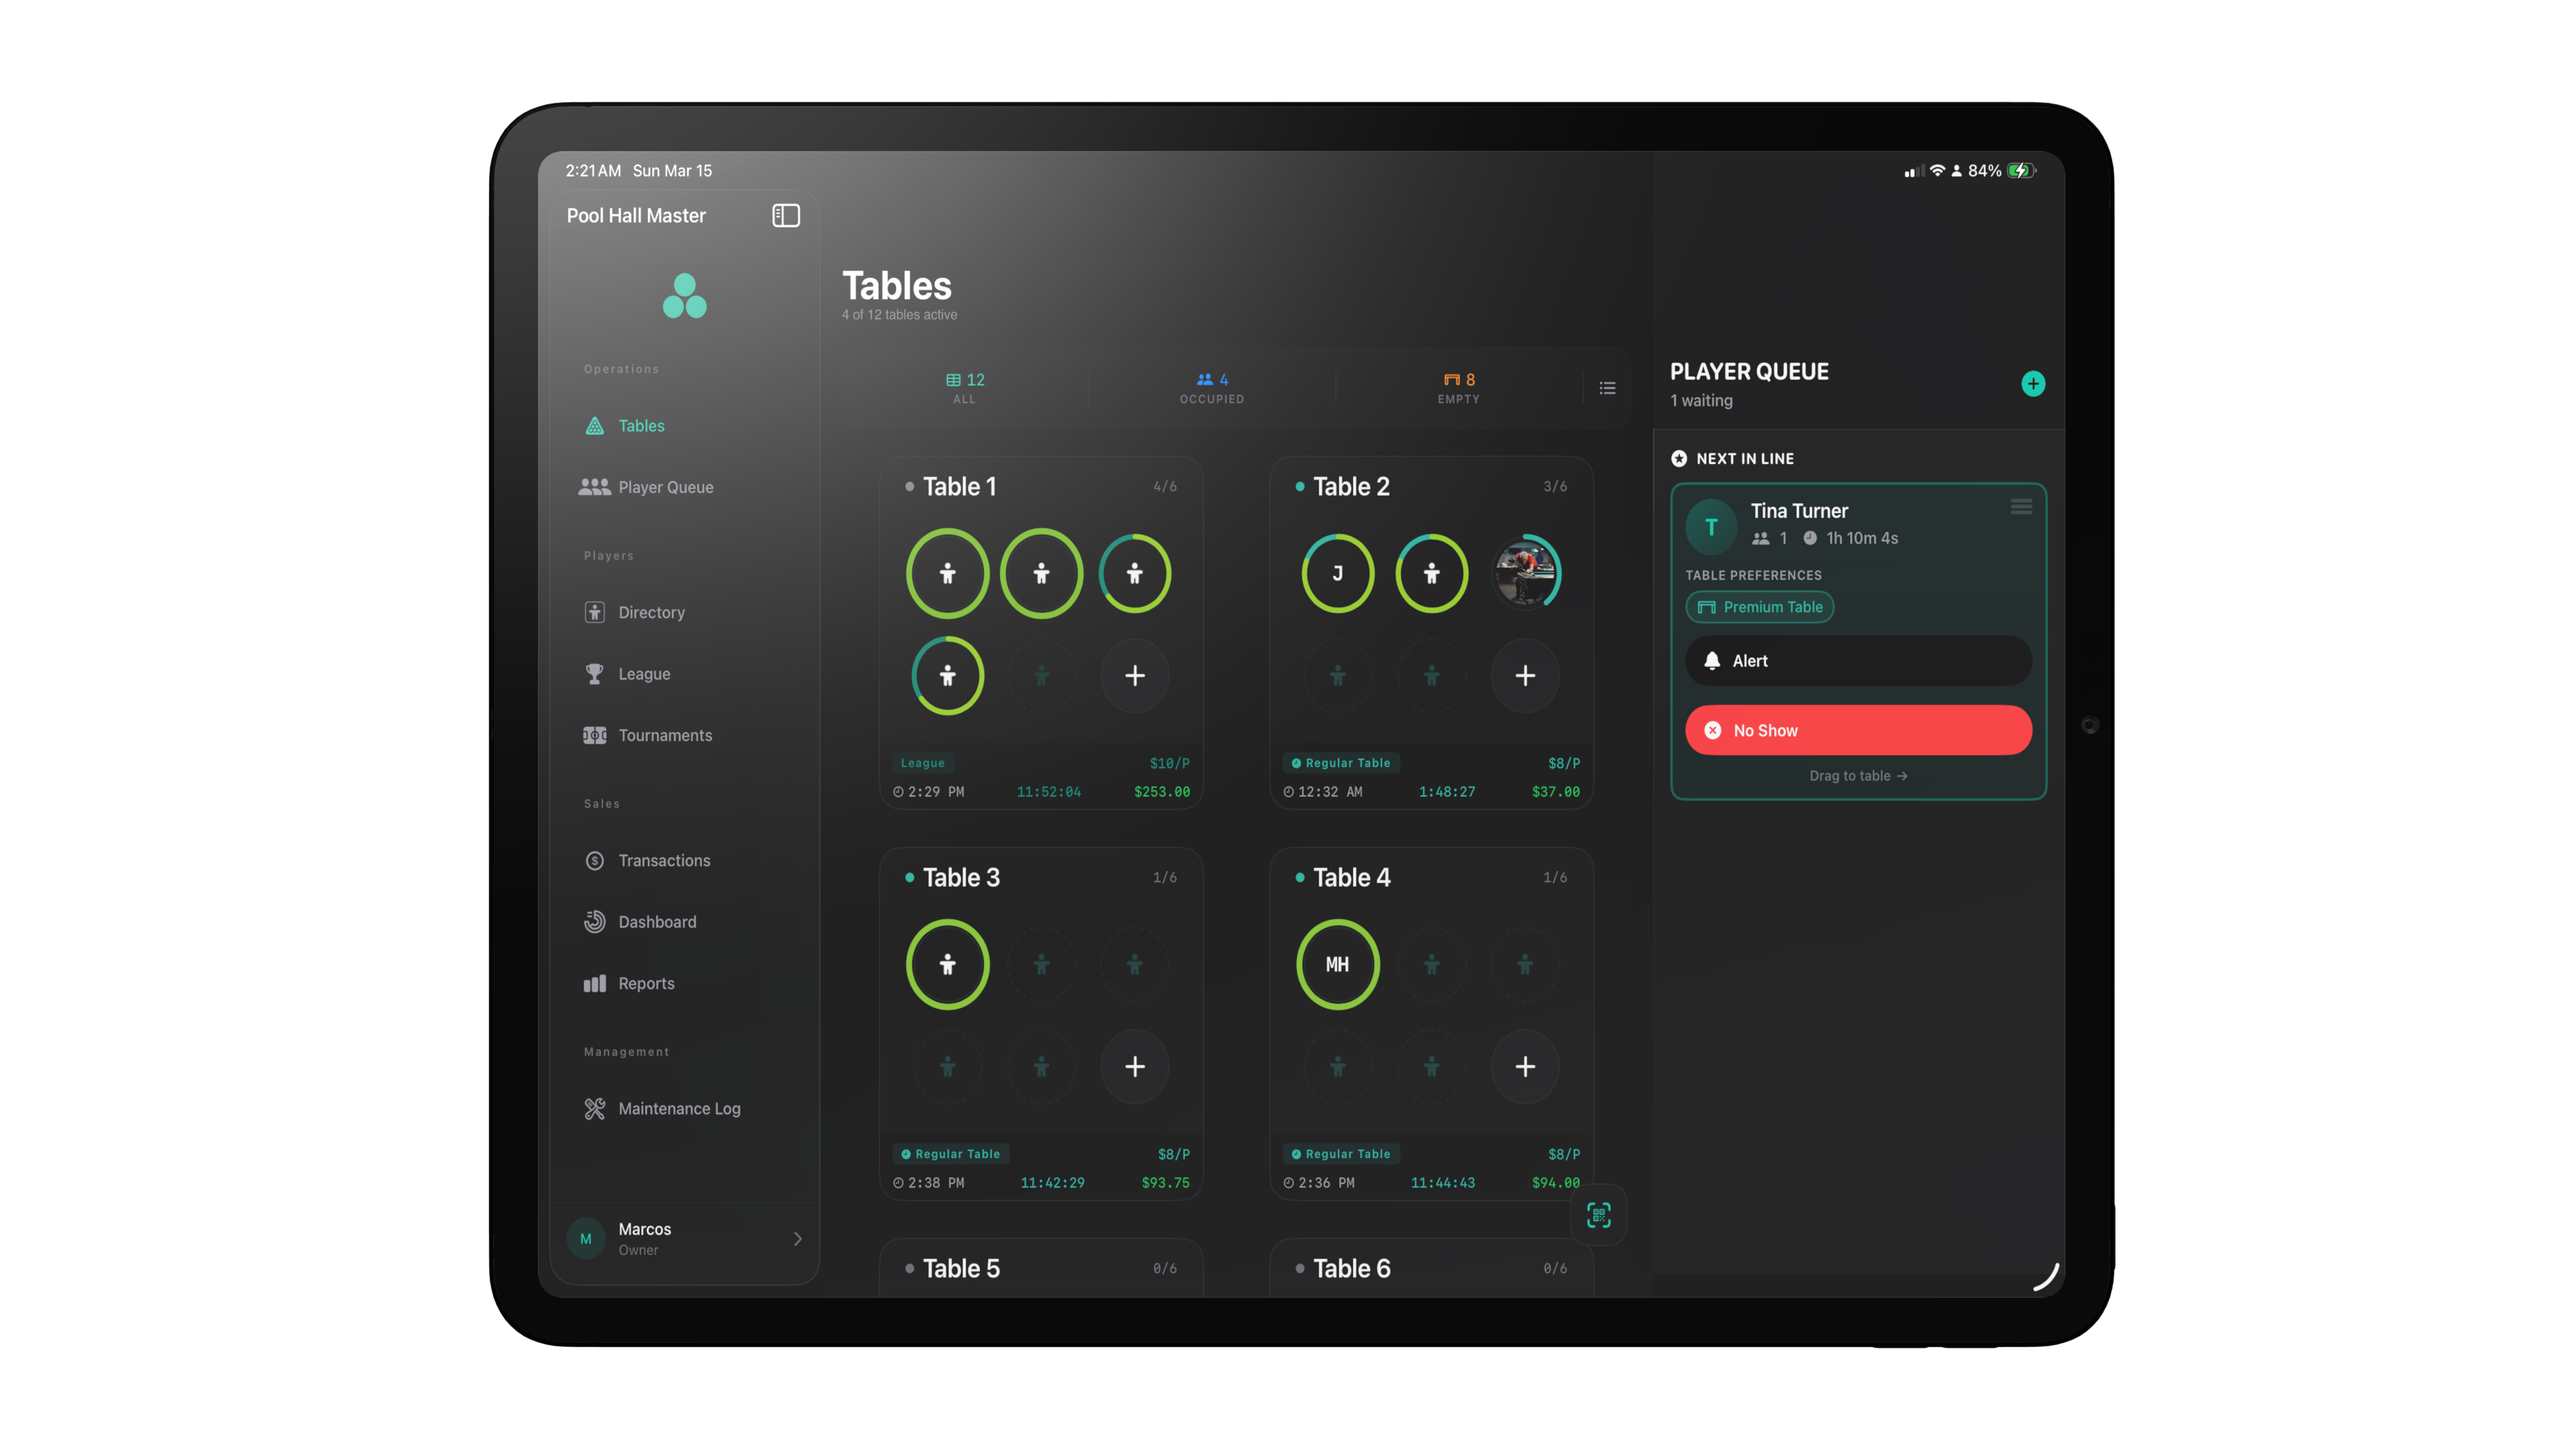
Open the Floor, find the table you want to start, and tap + to add a player. The player is created with a placeholder name (P1, P2, …) and a timer starts immediately.
You can:
- Add more players the same way (one tap per seat).
- Tap any chip to rename or attach a CRM profile.
- Set a per-table flat rate or a per-table override from the sidebar (see Pricing models).
If the party is coming from the waitlist, see Running the Player Queue for the seat-from-waitlist flow.
During a session
The card and the sidebar give you everything you need mid-session:
- Per-player status (Playing / Paused) and elapsed time.
- The current rate (set by your default rate, a Rate Rule, the table type, the player’s membership, or a per-table override — whichever applies).
- Total time and total owed.
- Buttons to Pause Timer / Resume Timer, transfer players to another table, or apply a Time Adjustment (manually add or remove minutes).
Transferring players
In the sidebar or on a player chip you can use Transfer All Players or Transfer to move players to another table. Their elapsed time goes with them — no manual recalculation needed.
Ending — checkout
When the party is ready to pay, you check out the table.
- Open the table from the Floor.
- Tap Checkout Table (or Checkout Selected Player(s) if you’re only checking out some players).
- Review the Checkout Overview — it lists each player, their time, and the amount owed under Players & Charges.
- Tap Complete Checkout.
For tables with menu items attached (food and drink), you’ll see the more detailed Checkout Table sheet with these sections:
- Player Time — check-in time, elapsed time, amount per player.
- Menu Items — anything added through the in-app POS or linked from Square.
- Subtotal, Tax (N%), Total Amount.
Payment options at checkout
Depending on which payment integrations are configured, the checkout sheet shows different action buttons:
- Send to Square (when POS Integration is connected) — pushes the line items into a Square Order so a Square Register can settle the tab. See Connecting Square POS.
- Pay Locally — record the payment inside Pool Hall Master without pushing it to an external POS.
- Complete Payment — when In-App POS is enabled and you’re taking payment in the app.
Editing or refunding past sessions
Past checkouts live in the Transactions tab.
- Tap a transaction to open Transaction Detail.
- Use Refund to refund the transaction (full or partial).
- Use Reopen Tab to recreate a tab with the same items — useful when a customer comes back and wants to keep adding to a closed-out tab.
Operational edits while a session is live
If a session is still active and you need to fix the time (e.g. you forgot to start the timer when they sat down), use a Time Adjustment on the player chip:
- Open the player chip → Apply Time Adjustment.
- Enter the minutes to add (or remove).
- Confirm — the chip’s elapsed time updates.
This lets you correct mistakes without ever leaving the live session view.